
Roofing is one of the most crucial components of any home or building. It serves as the first line of defense against the elements, shielding your home from rain, snow, wind, and harsh sunlight. However, even the most well-built roof can experience issues over time, with leaks being among the most common and troublesome problems. Roof leaks are not only frustrating but can lead to extensive damage if left untreated, compromising the structural integrity of your home. Understanding the causes of roof leaks, how to identify them, and how to repair them is essential for every homeowner. In this article, we will walk you through the key points every beginner should know about roof leaks, including how to spot, prevent, and address them before they cause significant harm.
What Causes Roof Leaks?
A roof leak occurs when water seeps into your home, usually due to damaged or worn-out roofing materials. The causes of these leaks can vary greatly, but they are generally the result of wear and tear, poor installation, or unforeseen weather conditions. Here are the most common culprits:
-
Damaged or Missing Shingles: Over time, shingles can crack, curl, or go missing altogether. Weather elements like rain, hail, and wind can exacerbate this process. If shingles are damaged or missing, water can easily find its way under the roof, leading to leaks.
-
Damaged Flashing: Flashing is the metal or plastic material installed around roof penetrations, such as chimneys, skylights, and vents. Flashing is designed to prevent water from seeping under the roofing material. If flashing is cracked, corroded, or improperly installed, it can lead to leaks.
-
Clogged Gutters: Gutters are designed to direct water away from the roof and foundation. When gutters are clogged with leaves, debris, or dirt, water can pool up, causing pressure against the roofing system and leading to leaks.
-
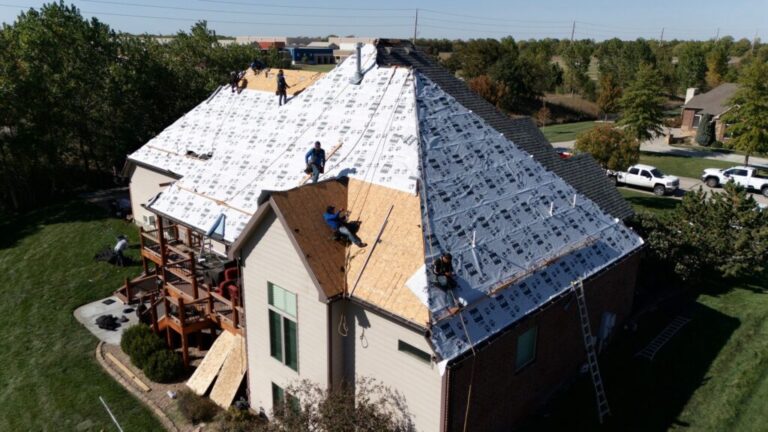
Poor Installation: Sometimes, leaks are the result of improper roof installation. Poor workmanship during installation can lead to gaps in the roof, misalignment of shingles, or improperly sealed edges, all of which can allow water to penetrate.
-
Age of the Roof: As roofs age, they naturally become more vulnerable to leaks. The materials degrade over time, and minor damage can become a significant problem. If your roof is 15 to 20 years old, it may be more prone to leaks, even if it appears to be in decent condition.
-
Ice Dams: In colder climates, ice dams can form on the edge of the roof during winter. These dams prevent water from draining off the roof, and as the water backs up, it can seep under shingles and into your home.
-
Improper Roof Ventilation: Adequate ventilation is vital for regulating the temperature and moisture levels in the attic. Without proper ventilation, heat and moisture can build up, leading to the deterioration of roofing materials and causing leaks.
How to Identify a Roof Leak
Spotting a roof leak early is critical in preventing further damage. While leaks are often hidden, there are several signs you can look for both inside and outside your home.
-
Water Stains on the Ceiling: One of the most obvious signs of a roof leak is the appearance of water stains or damp patches on the ceiling. These stains may appear yellow or brown and are often accompanied by peeling paint or bubbling. Water stains typically indicate that water is getting through the roof and into the interior of the home.
-
Sagging or Discolored Ceiling: If you notice that the ceiling is sagging, this is a clear indication that water has accumulated in the space above. In some cases, the ceiling might even be soft or damp to the touch, which suggests significant water infiltration.
-
Musty Odor: A persistent musty smell in your attic or upper floors could be a sign of mold or mildew, which often results from roof leaks. If you can smell dampness or mildew, it’s essential to inspect your roof for leaks.
-
Drips and Puddles: The most straightforward sign of a roof leak is water dripping from the ceiling. If you can trace the water back to its source, you’ll have a clear idea of where the leak is occurring.
-
Visible Roof Damage: Go outside and inspect your roof for visible signs of damage, such as missing shingles, cracks, or worn areas. This can give you an indication of where the leak might be coming from.
How to Fix a Roof Leak
If you notice signs of a roof leak, it’s important to address it promptly to prevent further damage. While some small leaks can be fixed with DIY repairs, larger issues may require the help of a professional roofer. Below are some general steps to fix a roof leak.
1. Find the Source of the Leak
The first step in repairing a roof leak is finding its source. If you’re able to access your attic, do so, and look for water stains or damp insulation. You can also check the roof from the outside for damaged shingles or flashing. Sometimes, the leak will be directly above the water stains inside your home, making it easier to pinpoint the problem. If you’re unsure of the leak’s location, a professional roofer can conduct a more thorough inspection.
2. Temporary Fixes
If you need to stop the leak temporarily while waiting for professional repairs, you can use roofing tape, tar, or sealant to cover the damaged area. However, keep in mind that this is a short-term solution and should be followed by permanent repairs as soon as possible.
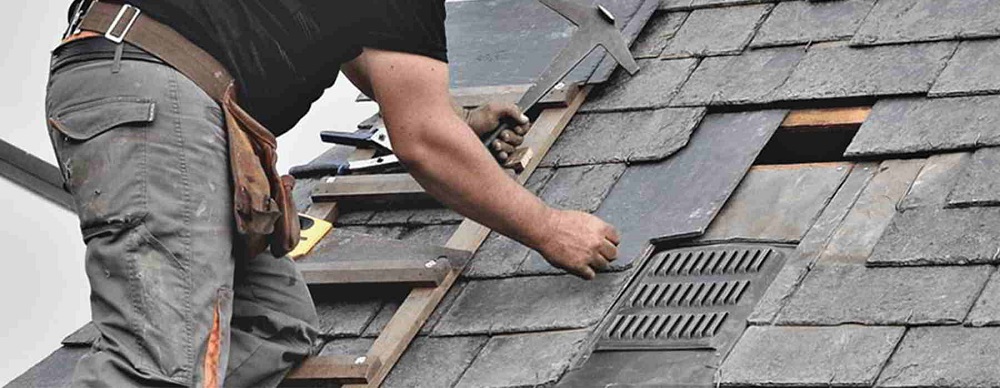
3. Shingle Replacement
If you find missing or damaged shingles, they should be replaced immediately. To do this, lift the edges of the surrounding shingles, remove the damaged ones, and slide in the new shingles. Secure them in place with nails, and ensure the edges are sealed with roofing cement.
4. Repairing Flashing
If the flashing around a chimney, skylight, or vent is damaged, it will need to be repaired or replaced. Remove the old flashing, clean the area, and install new flashing. Make sure to apply a sealant around the edges to ensure a watertight fit.
5. Gutter Maintenance
Regularly clean your gutters to prevent water buildup. If you notice that your gutters are clogged, clear them out, and check for any leaks in the downspouts. Installing gutter guards can also help prevent debris buildup and reduce the risk of leaks.
Preventing Roof Leaks
Preventing leaks is far better than dealing with the aftermath of water damage. Here are a few steps you can take to prevent roof leaks:
-
Regular Inspections: Inspect your roof at least once a year to identify any potential issues before they become serious problems.
-
Keep Gutters Clean: Clean your gutters regularly to ensure that water flows freely off the roof.
-
Maintain Flashing: Ensure that flashing around roof penetrations is intact and well-sealed.
-
Improve Ventilation: Proper attic ventilation can prevent moisture buildup, which can contribute to leaks.
-
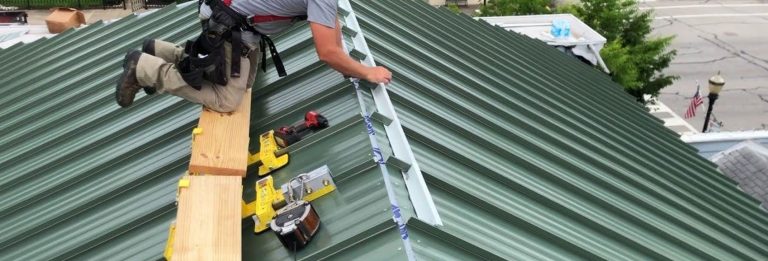
Roof Coatings: Consider applying a protective roof coating that can add an extra layer of defense against water penetration.
When to Call a Professional
While minor roof leaks can be fixed by homeowners, it’s often best to call a professional roofer for more significant issues. A roofing expert can accurately assess the extent of the damage, perform the necessary repairs, and ensure the roof is properly sealed and waterproofed. Additionally, if your roof is older or has significant damage, replacing the roof may be the best long-term solution.
Conclusion
Roof leaks are a common issue that can lead to significant damage if not addressed promptly. By understanding the causes of leaks, how to spot them, and how to repair and prevent them, you can protect your home and avoid costly repairs. Whether you choose to handle minor leaks yourself or rely on a professional, regular roof maintenance and timely repairs are crucial for ensuring the longevity and durability of your roof. Keep an eye out for signs of leaks, and act quickly to maintain the integrity of your home’s most important protective layer.
You May Also Like
Residential Roofing Costs Fa ...
21 March 2026

Best Roofing Materials for H ...
19 March 2026
Innovative Solutions for Ref ...
14 August 2025
Popular Post
Best Roofing Materials for Hot Climate Regions
19 March 2026
Rental Yield Calculation Methods for Property Investors
18 February 2026Best Cities Offering Strong Real Estate Growth
15 February 2026